|
August 27, 2009 The Rock - a Rock-Ola Conversion or just another boat anchor?
I decided to tackle the amp with the attitude of "bring it back to life, but don't spend any money on it". First things first. I was able to locate a wiring diagram that showed the amp schematic and most of the interconnections associated with the amp circuitry. That really saved me some time and hair pulling. The amp is not complicated, but figuring out all the plugs and interlocks just to get it powered up would be a challenge without a wiring diagram. Who would have thought that unplugging the speaker would also kill AC power to the PT? So, there will be some interesting challenges. I cleared the bench and began stringing all the parts together. Can you believe that huge PT on the chassis does not have a filament winding? The tubes were lighted from another transformer on a separate control chassis. That control chassis also supplied primary power to the onboard PT. With the control chassis connected to the wall and the amp chassis, I was finally able to get power and filaments to the amp, with the rectifier pulled. I was delighted to see all the tubes light up! Next, I built a 5KΩ/20W resistor from a cluster of 2 watt CCs to simulate the busted field coil. I married this cluster to the speaker, then plugged the speaker connector into the amp. At this point, my workbench was full. I barely managed to make room for my meter. I plugged in the 5U4 and powered up this tangled mess. The B+ came up and one 6L6 went cherry. I pulled the 6L6s and proceeded to make some checks and soon concluded that there was nothing major wrong with this amp. However, after flipping the chassis a couple times, I realized I needed a better/safer setup to work on this. I tore my kludge apart and proceeded to figure out how to put everything on one chassis and get a real working speaker connected. I scrounged an oversized filament transformer, a 5KΩ/30W resistor, power cord and switch, and began grafting onto the amp chassis. Finally, I had the amp with all necessary components on one chassis. Well, except the volume control. That was connected to a 3 foot shielded cable and plugged into the chassis. There was also a 50 footer remote volume control. I expect that is the reason for a cathode follower driving the volume/tone controls. Anyhow, now I can work on this amp without having to fear shorted wires when I have to flip the chassis. Another day. Well, I'm refreshed and ready to see what it's gonna take to make this amp sing. I turned it on and to my surprise, it started up. Didn't know the words, but it could hum pretty good. I bridged a 20uF cap across the input filter cap and the hum disappeared. And I could touch the input phono jack and the speaker would bark quietly. All pots were noisy but a good dose of DeoxIT took care of that. It's just gonna be simple trouble shooting from this point. I replaced the leaky coupling caps (this also fixed the cherry 6L6) and replaced the plate load resistors for the little bottles (most had drifted up to over twice their painted values). It's time to see what a guitar sounds like through this old amp. After all, that's the whole point. Right! I need another amp! I replaced the phono jack with a guitar friendly jack and plugged in. The amp actually had a decent sound but just not loud enough for a pair of 6L6s. I put a set of new tubes in the amp and really improved the tone, but it was still too quiet.
So, I simply duplicated the first gain stage and sandwiched the Fender tone stack between them. I was pleasantly surprised! It all worked very well together. I did add a raw control to the tone stack. And I put a switch on that 5KΩ field coil simulator. With that switch open, the B+ at nodes B and C increased about 80 volts, getting a little closer to the blackface sound. Just close the switch for a browner sound. I can't really say what gives this amp it's magic. Is it the 6SN7s? The cathode biased 6L6s? The massive iron? Those odd looking components? The tone stack? Or is it just the whole combination? Maybe I'm just overjoyed that it even works and there really is no magic. After all, I no longer have a very good ear for this stuff. I've been playing through a 15" Eminence Big Ben. The bottom end is tight and very pronounced. The top is clear as a bell, but not that piercing glass shattering sound. I think the cathode biased 6L6s give a warm, slightly compressed sound. But, flip the brown switch on and diddle the raw control, and you can play your favorite ZZ Tops tunes. And there are a lot of tone combinations in between those settings. The amp is probably about as loud as my TDR (single channel Deluxe Reverb). Each 6L6s is currently idling at about 25 watts. This has been a fun project. After I got it working, I took it apart, scrubbed it, painted it, and put it back together again. At this point, there are no original solder joints left in this amp. And that's a good thing. Every original joint I heated while troubleshooting and replacing parts, simply crumbled and dropped off onto the chassis. And I'm simply amazed that the original cap can is still working. I'm gonna leave it in there for now. It may just outlast me! Oh, BTW. I did finally spent $14.00 for a filament transformer. All other parts were on hand so I'm not gonna count those. Well, enough jawing. Here's some pics. Looking back on this project, I wish I had taken some before photos. I really never expected this project to turn out the way it did. It's kinda like a Cinderella story. P.S. I've since replaced the 5R4 with a 5AR4 just to give the 6L6s more warm up time before the B+ comes up.
Download the schematic (includes original drawings and parts list and my Visio drawings) Here's what the original jukebox looked
like at one time. It's really not about that though. |
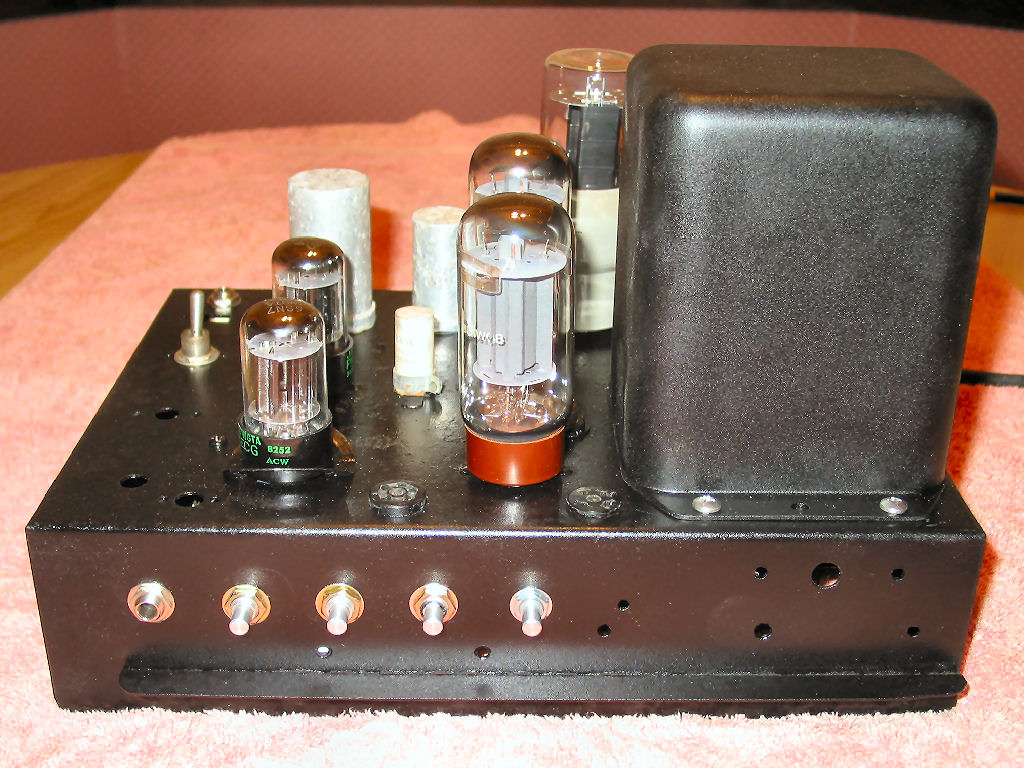
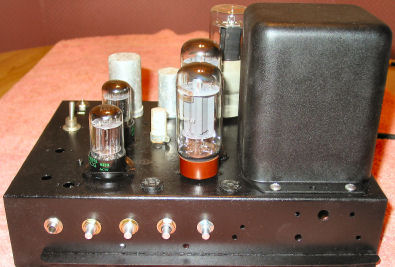 This
old 1954 vintage amplifier was removed from a non-working Rock-Ola model 1442
jukebox that was beyond restoration. In fact, the amp looked really nasty too.
The jukebox had been in a barn since the '70s and had been wet many times. The
selector panel switch bank was crumbling, the cabinet was rotten, the changer
was frozen, and the old Jensen F12-N needed a new cone and the field coil was
open.
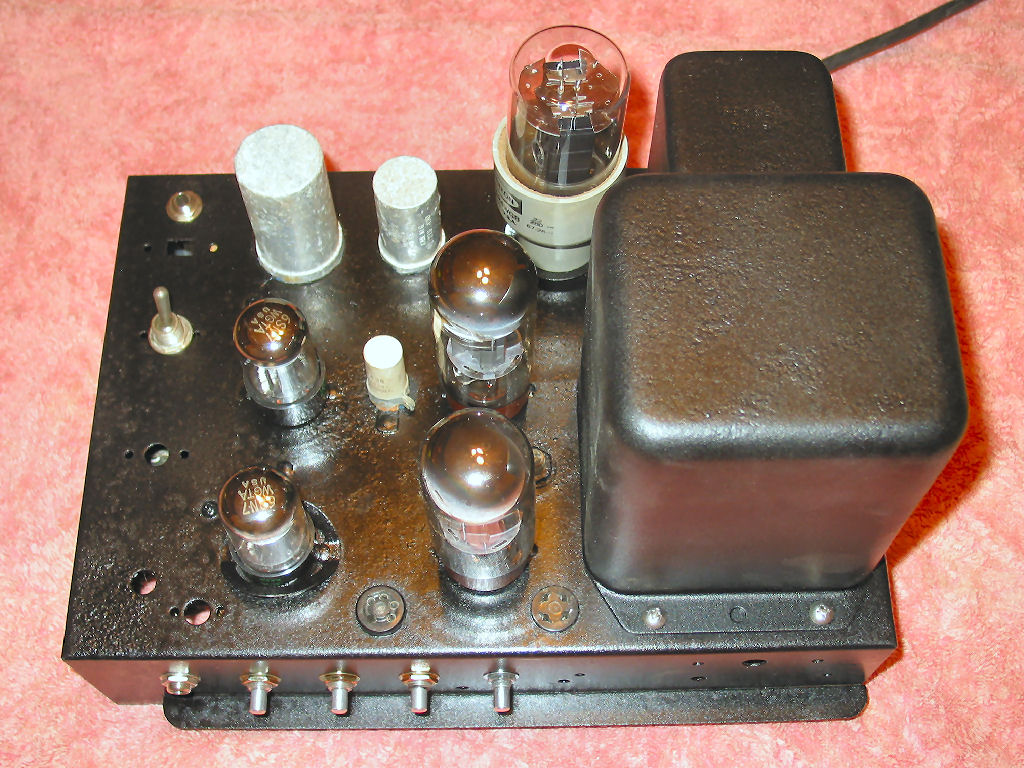
This
old 1954 vintage amplifier was removed from a non-working Rock-Ola model 1442
jukebox that was beyond restoration. In fact, the amp looked really nasty too.
The jukebox had been in a barn since the '70s and had been wet many times. The
selector panel switch bank was crumbling, the cabinet was rotten, the changer
was frozen, and the old Jensen F12-N needed a new cone and the field coil was
open. At
this point, I decided to convert the first tube to a guitar type preamp. The
idea was to leave the power supply, power amp, and phase inverter as is, but put
a Fender AB763 preamp in the first tube hole. I wanted to stay with the 6SN7,
even though it's a medium mu tube, just to see if I could get away with it. I
figured that if this amp could provide loud jukebox music from a ceramic phono
pickup thru a meduim mu gain stage and cathode follower, it should be able to
make a loud guitar noise through two medium mu gain stages. Sounds logical,
right?
At
this point, I decided to convert the first tube to a guitar type preamp. The
idea was to leave the power supply, power amp, and phase inverter as is, but put
a Fender AB763 preamp in the first tube hole. I wanted to stay with the 6SN7,
even though it's a medium mu tube, just to see if I could get away with it. I
figured that if this amp could provide loud jukebox music from a ceramic phono
pickup thru a meduim mu gain stage and cathode follower, it should be able to
make a loud guitar noise through two medium mu gain stages. Sounds logical,
right?