|
May 15, 2019
Phoenix... All American Dual
Lite
 A
while back I sold my 6V6Plexi amp to a Hoffman forum member. He then commisioned
shooter, another forum member, to strip the guts from the 6V6Plexi chassis and
install into a chassis for a Marshall combo cab. Then shooter sent me the empty
chassis. I put the chassis on the bench and began thinking what to do with it.
And how could I utilize the old Plexi layout to build something completely
different. I considered building a Deluxe AB763 Lite but there would be lots of
empty holes and my board layout would need a total redesign. Then it hit me. Just
build another dual lite but this time use an all American theme. Ampeg would be
a good match with the Fender circuit. That would fill up all the holes on the
front plus fill all the tube sockets. A
while back I sold my 6V6Plexi amp to a Hoffman forum member. He then commisioned
shooter, another forum member, to strip the guts from the 6V6Plexi chassis and
install into a chassis for a Marshall combo cab. Then shooter sent me the empty
chassis. I put the chassis on the bench and began thinking what to do with it.
And how could I utilize the old Plexi layout to build something completely
different. I considered building a Deluxe AB763 Lite but there would be lots of
empty holes and my board layout would need a total redesign. Then it hit me. Just
build another dual lite but this time use an all American theme. Ampeg would be
a good match with the Fender circuit. That would fill up all the holes on the
front plus fill all the tube sockets.
So the resurrection began. I say that because I don't view this project as
building another amp. It's more like bringing an amp I previously built back
to life. That's what my wife believes! I had also recently listened to
Fogelberg's Phoenix album and that inspired the name for this project. The
Phoenix was rising!
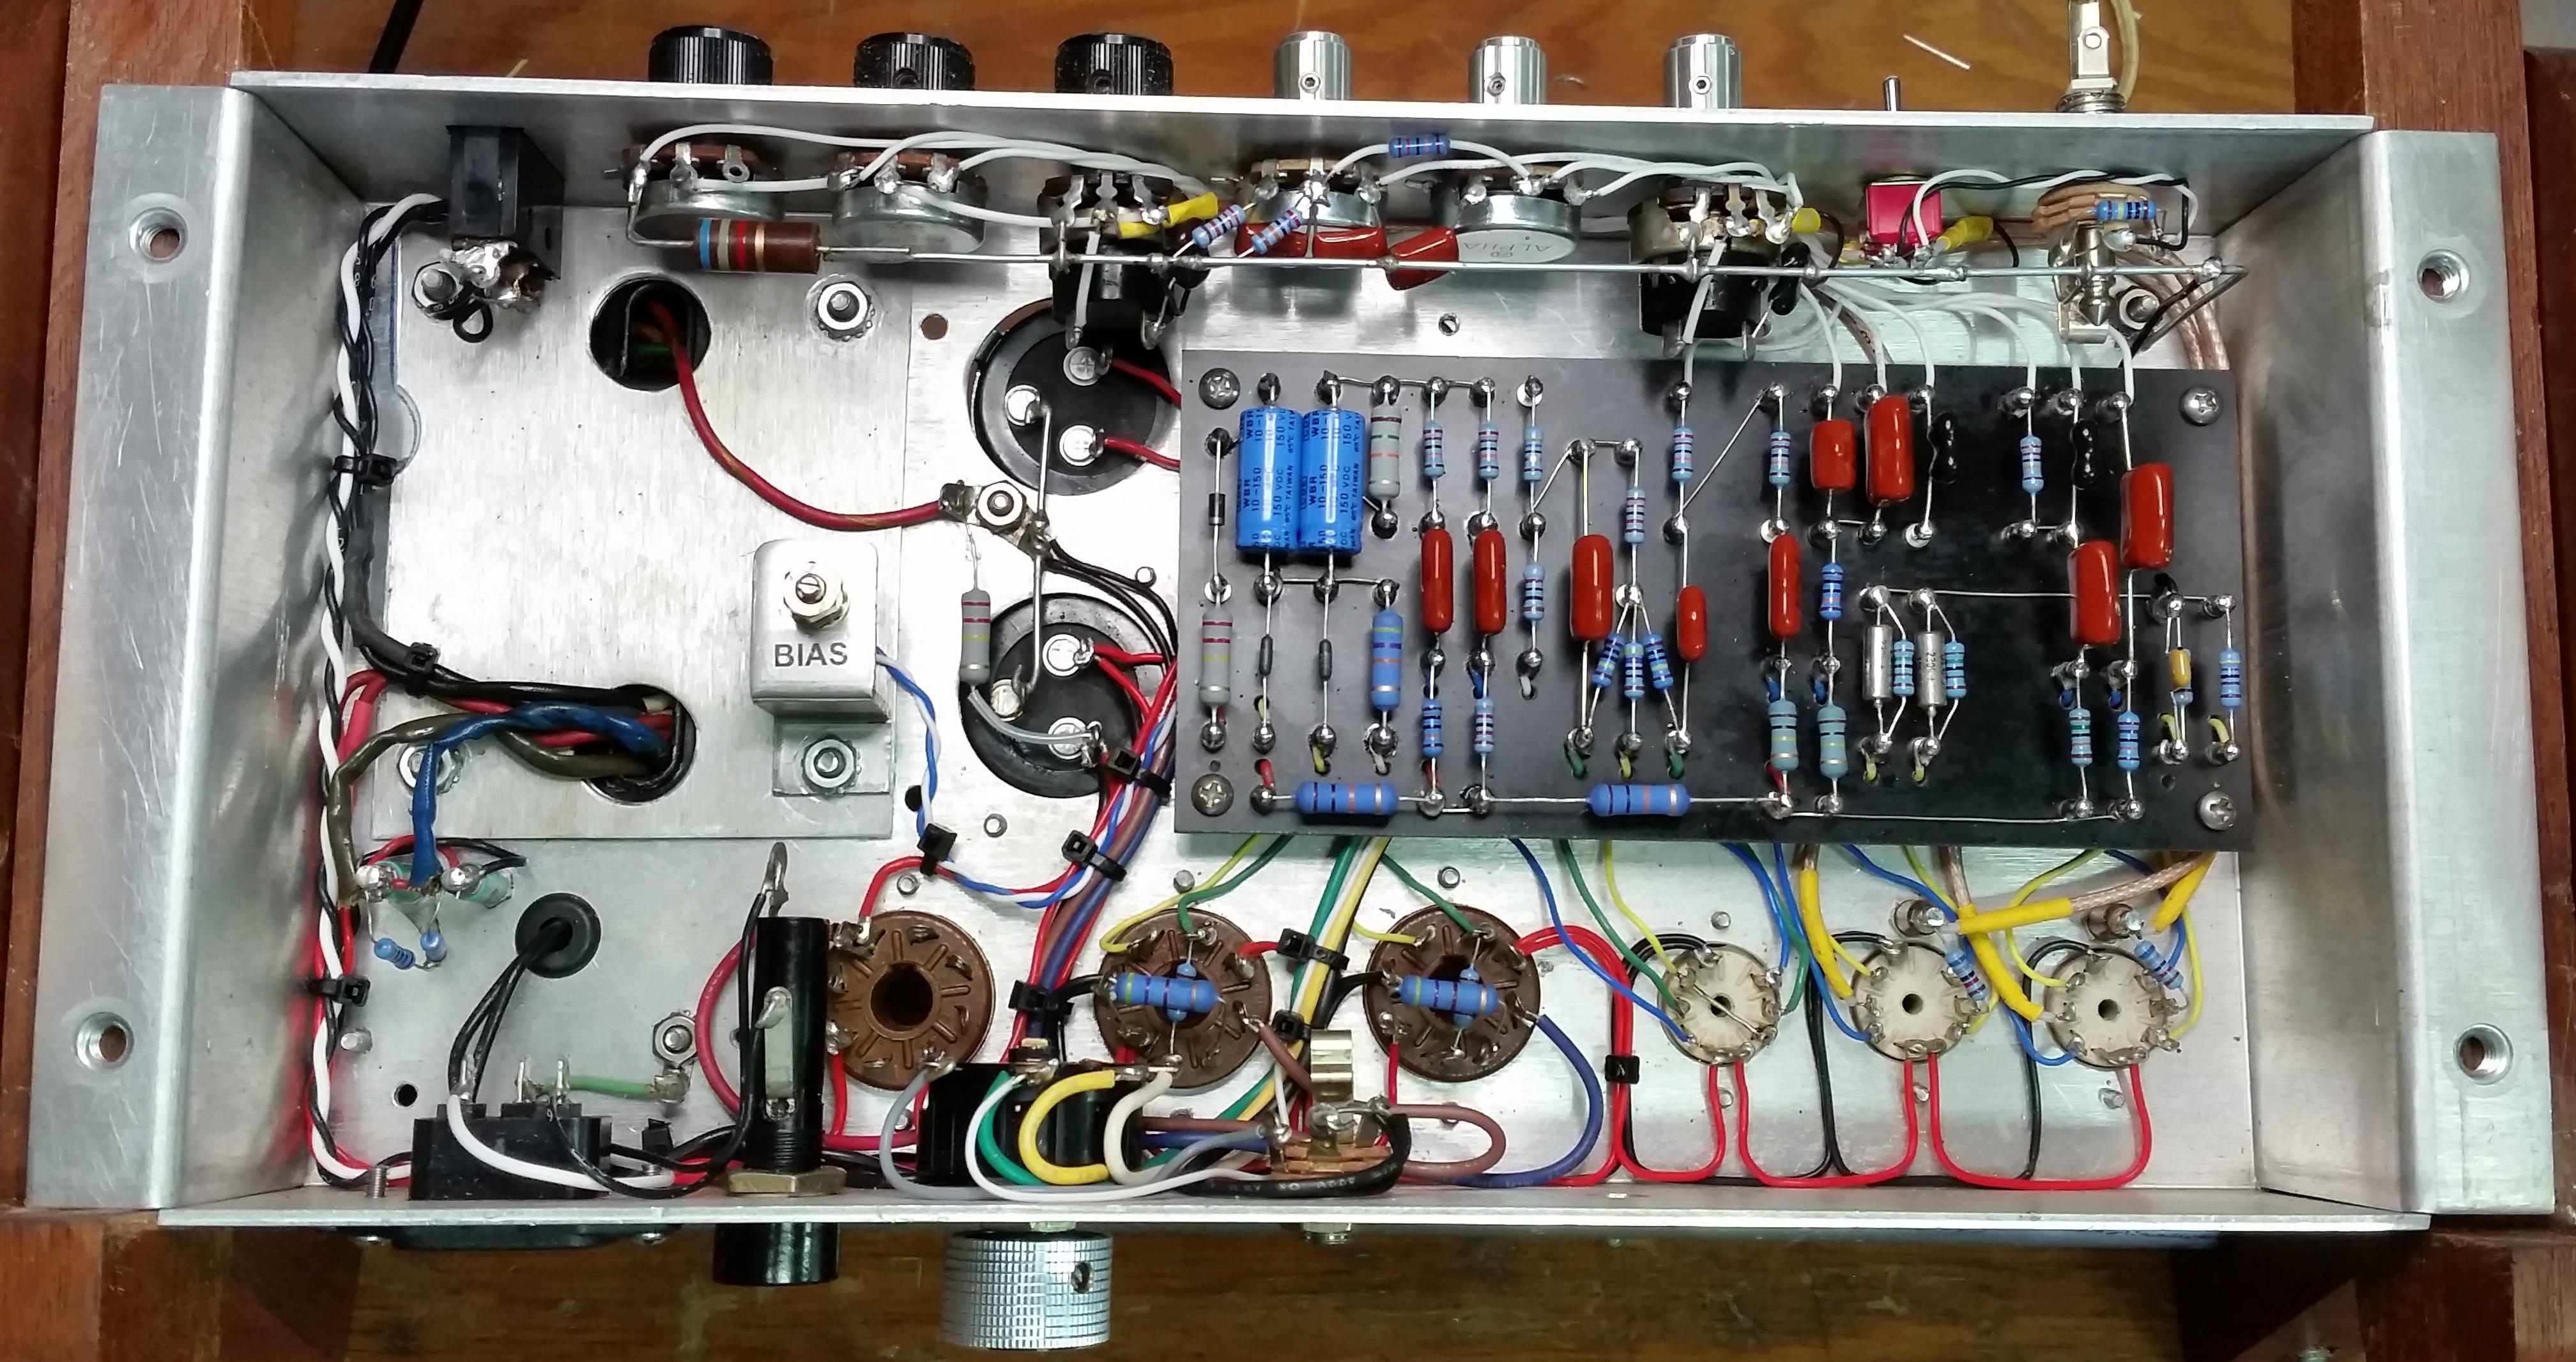
My next challenge was to design a board layout to accomodate both preamps
and a Fender AB763 power amp. Wouldn't it be nice if the board was exactly
the same size as the old Plexi board? It could just drop right in the same
screw holes. It took a while but I got it! Now to start gathering parts. I
had an old Fisher PT and one AO-43 OT that works well with 6V6s, but the PT
was a little hot. I fumbled around with big resistors and a 100mA load to
drop the B+ to 400V but was never quite satisfied with that approach. So I
decided to drop the 6V6 idea, buy a bigger OT and run 6L6s. Still an AB763
power amp but now more like a Band Master or Pro. So I ordered the OT, a few
caps, and board materials and was off and running... just in time for
Mother's Day! Had to put the brakes on for a bit.
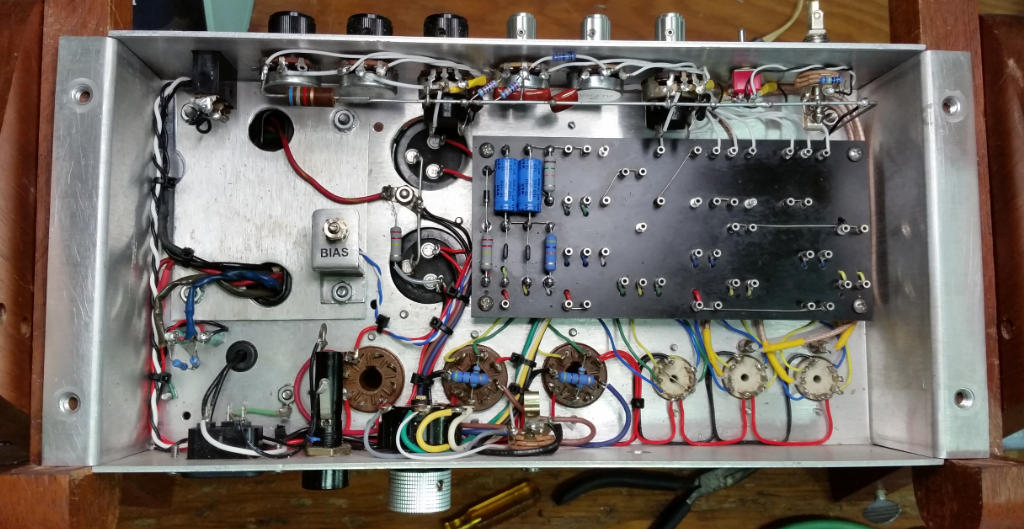
There really wasn't much chassis work to do. I cut a plate to mount the
standup style PT. I had to drill a few holes in order to rotate the OT.
Other than that it was just a matter of filling the old holes with new
components.
That big resistor was necessary to drop the B+ to run 6V6s. Later on I
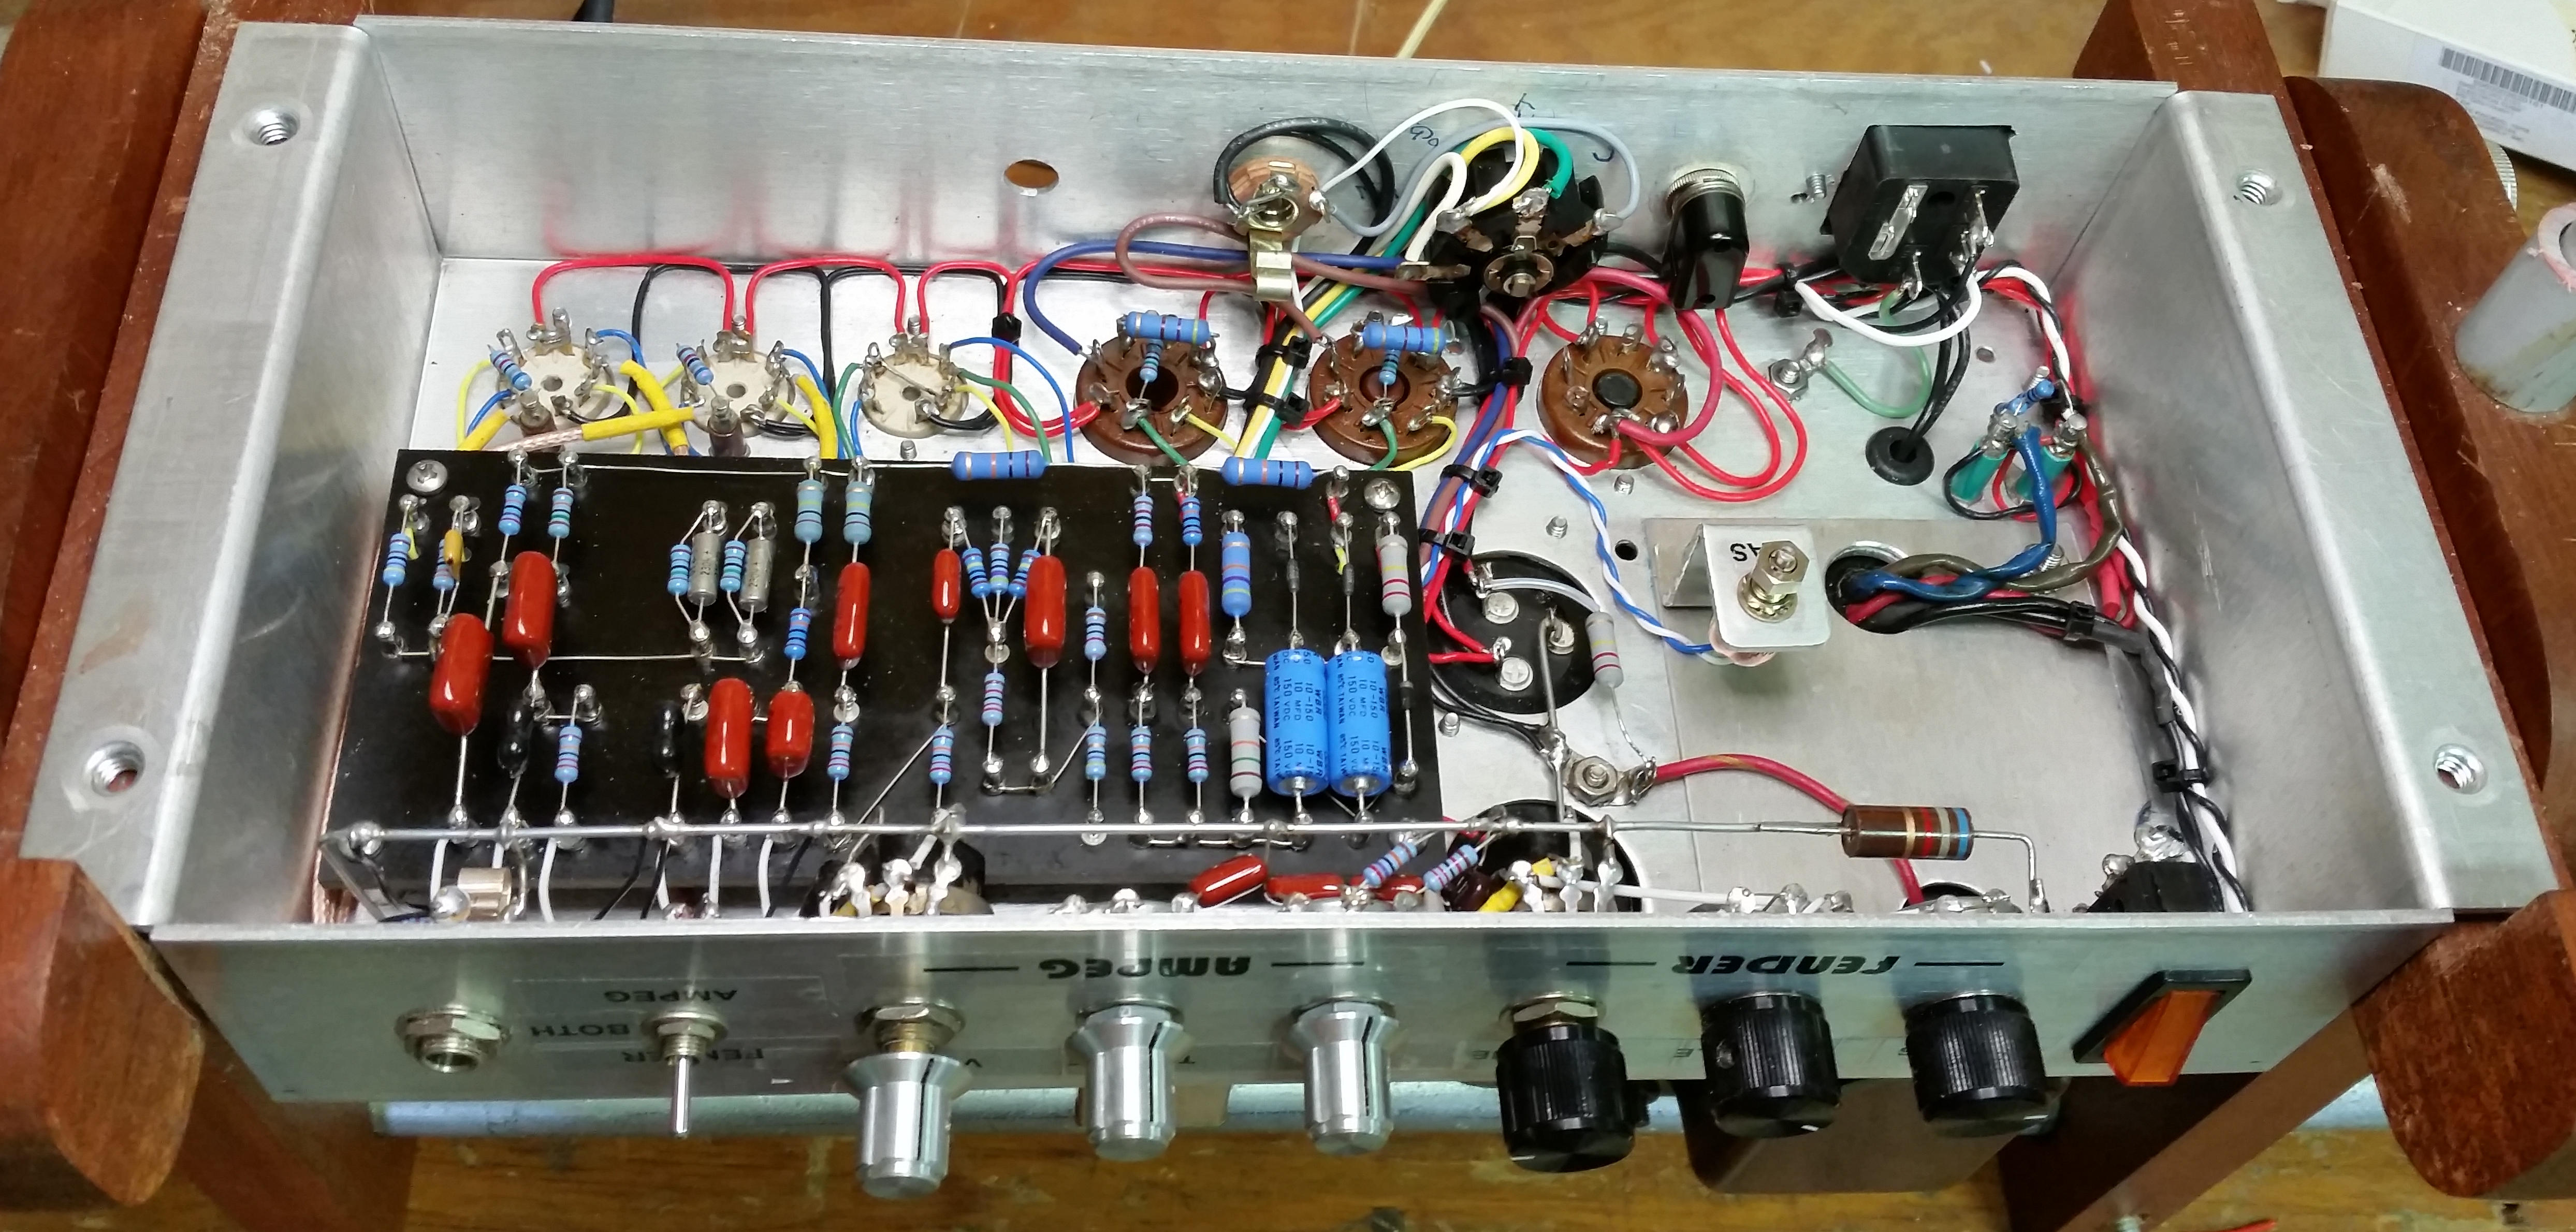
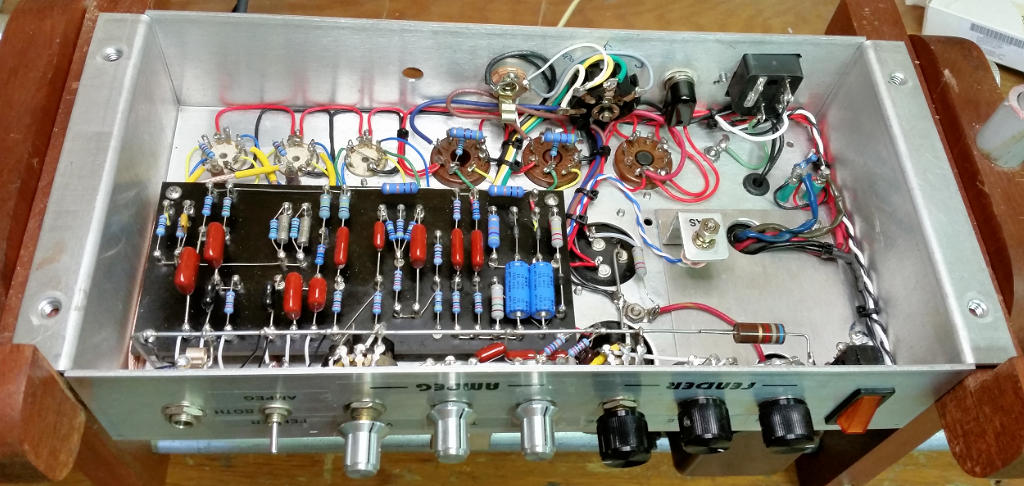
decided to run 6L6s so the resistor was removed. The control panel is mostly
wired with the Ampeg James tonestack components mounted directly on the pots.
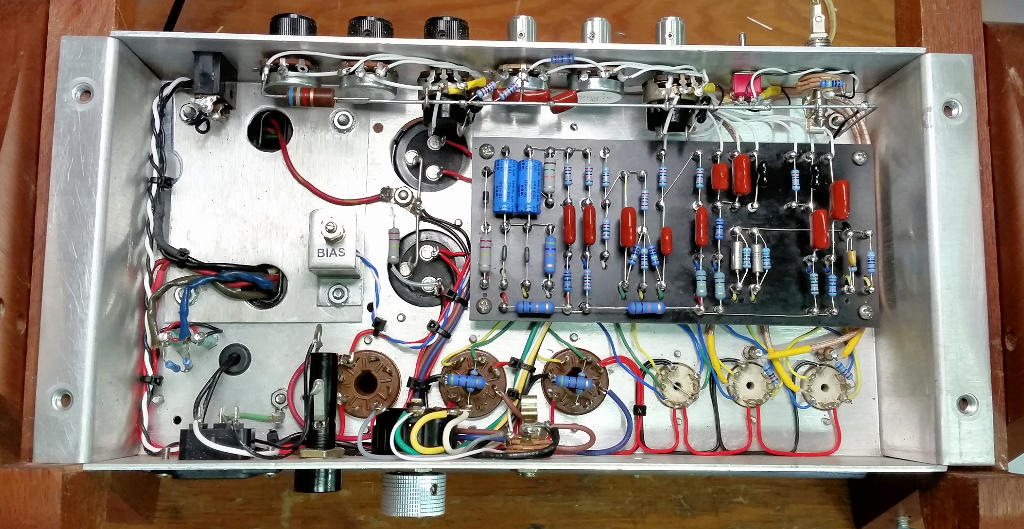
Just looks like another Plexi6V6 from this angle...
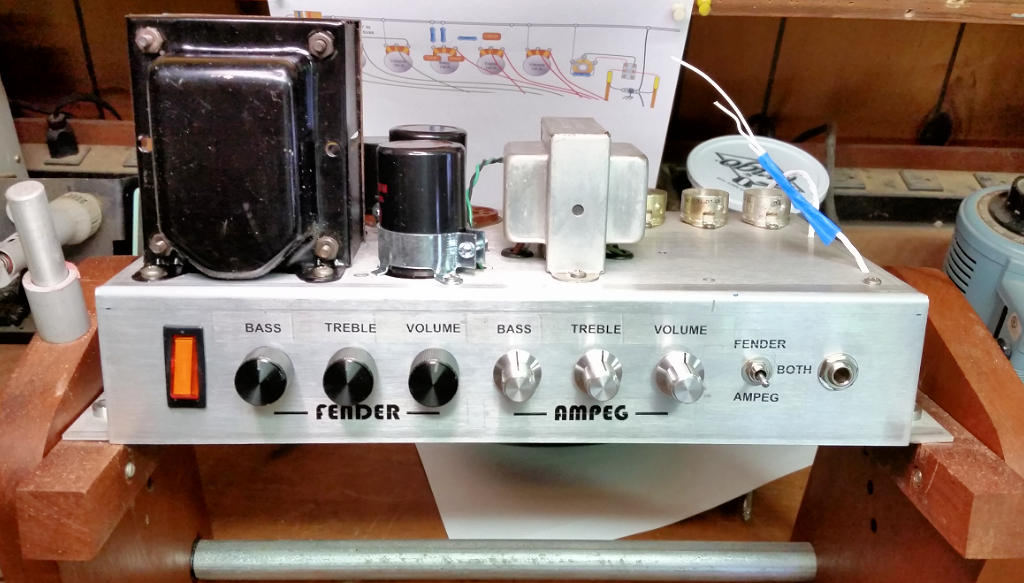
...But this time it's all American.
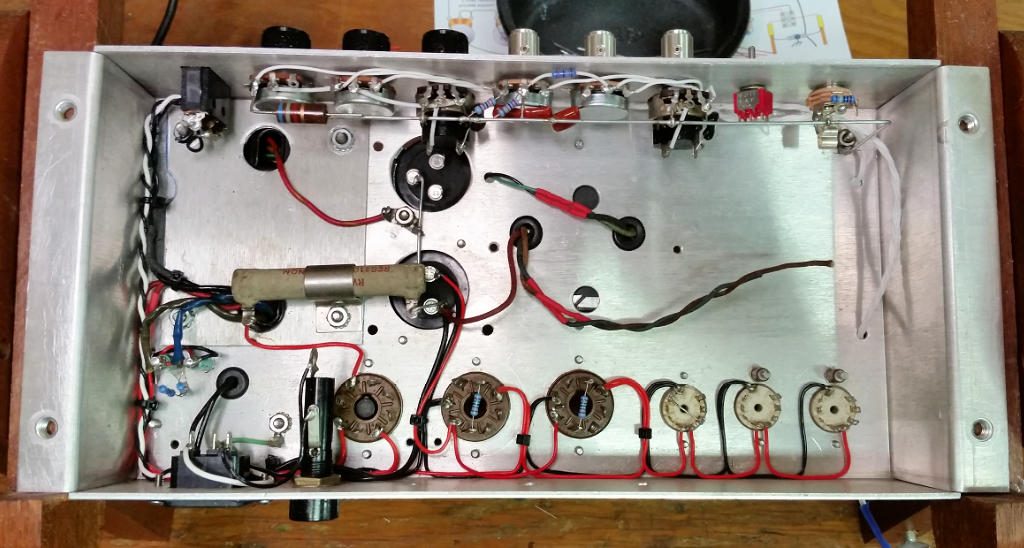
Now to make the board...
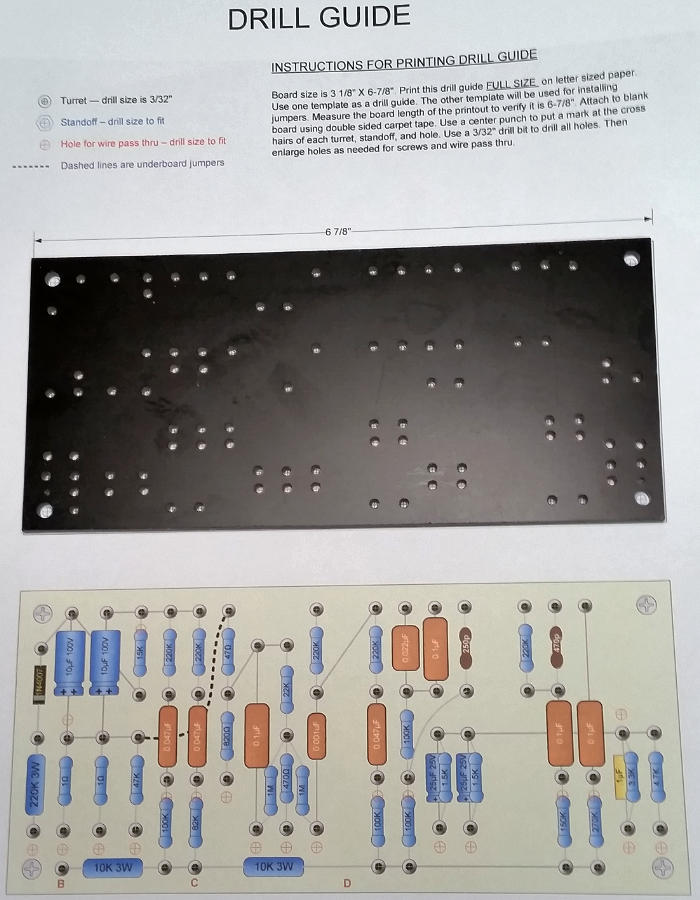
I cut the board to size, taped my drill guide to it, center punched hole
locations, and headed to the drill press.
Turrets were also staked at the drill press using Hoffman's turret staking tool
set.
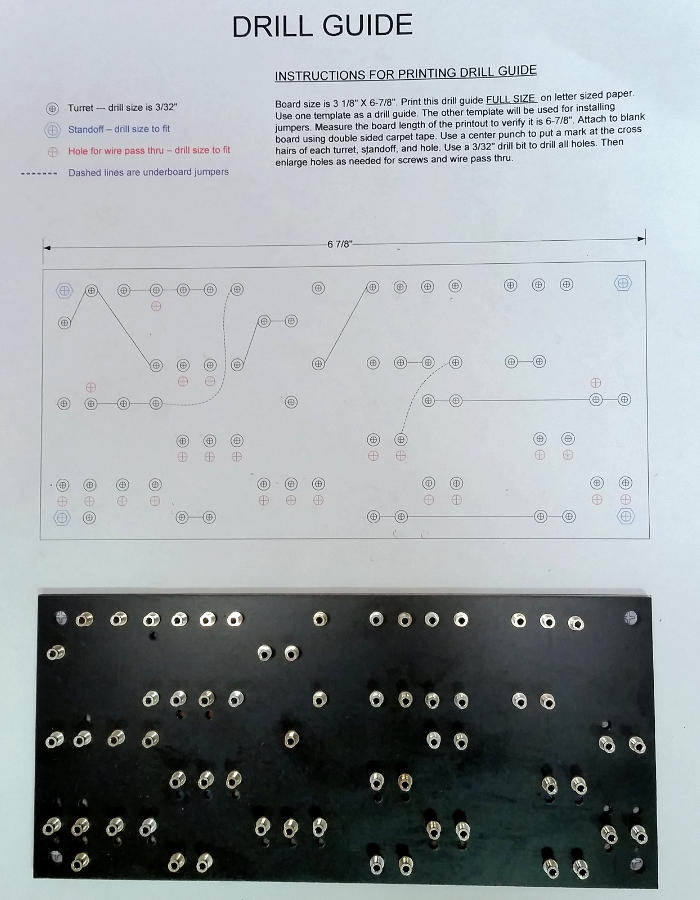
Back to the workbench to lace the turrets and install the underboard jumpers.
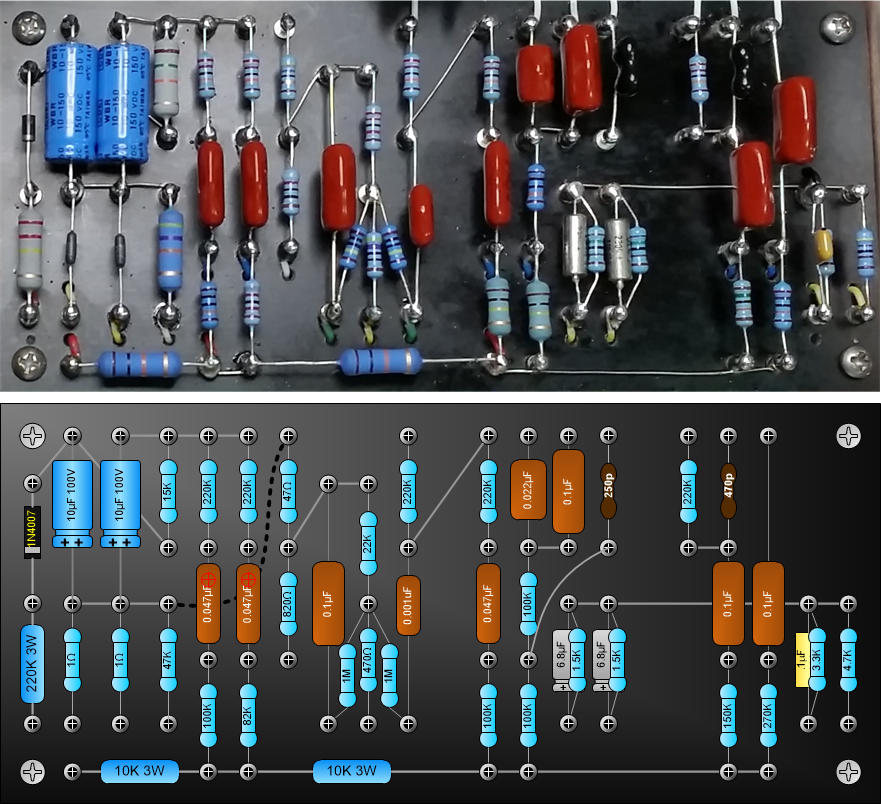
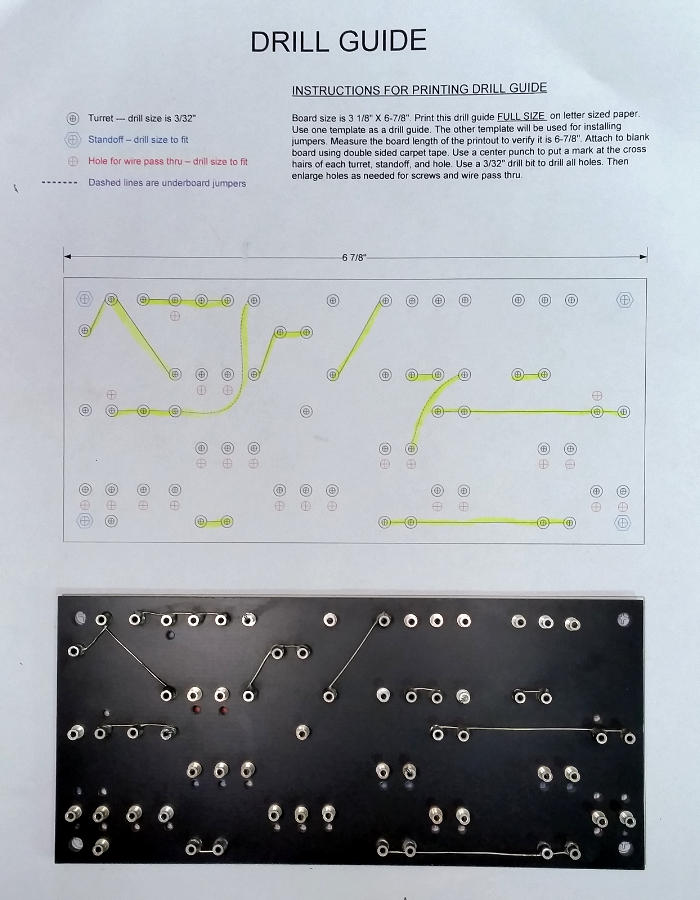
Completed board
versus Visio board
Next...
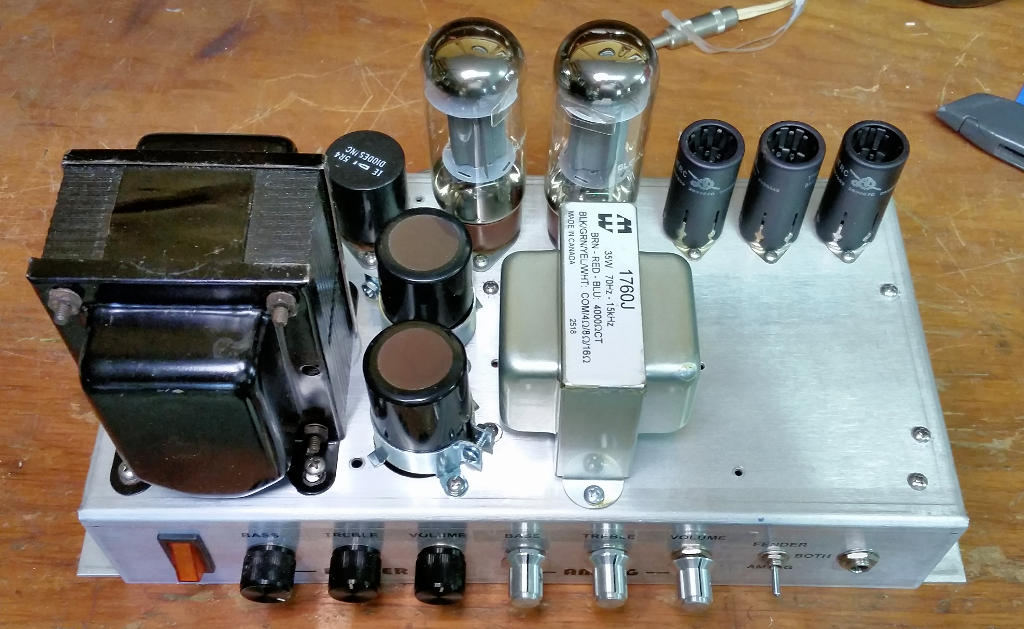
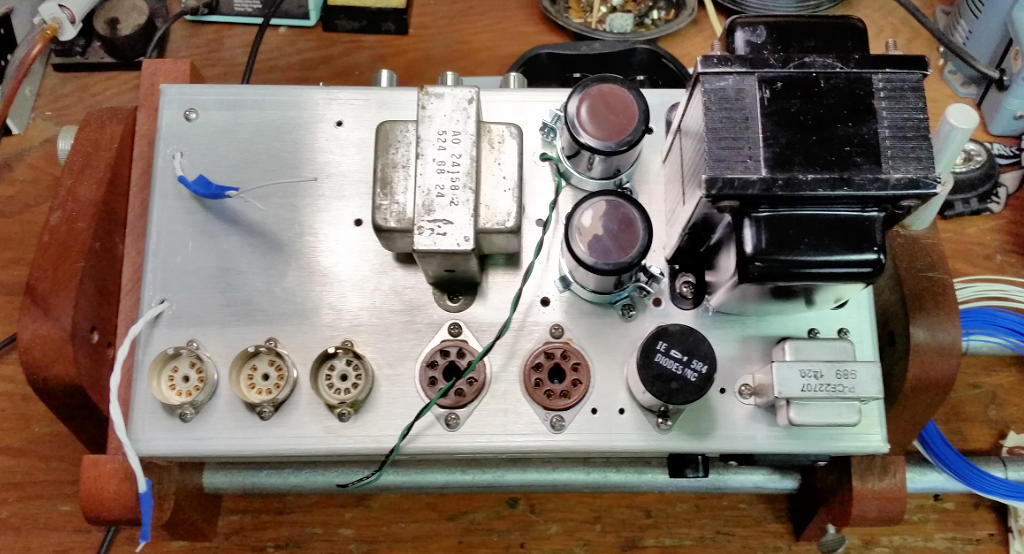
I decided to use 6L6s so I bought a Hammond 1760J OT. It's a good fit for
this chassis.
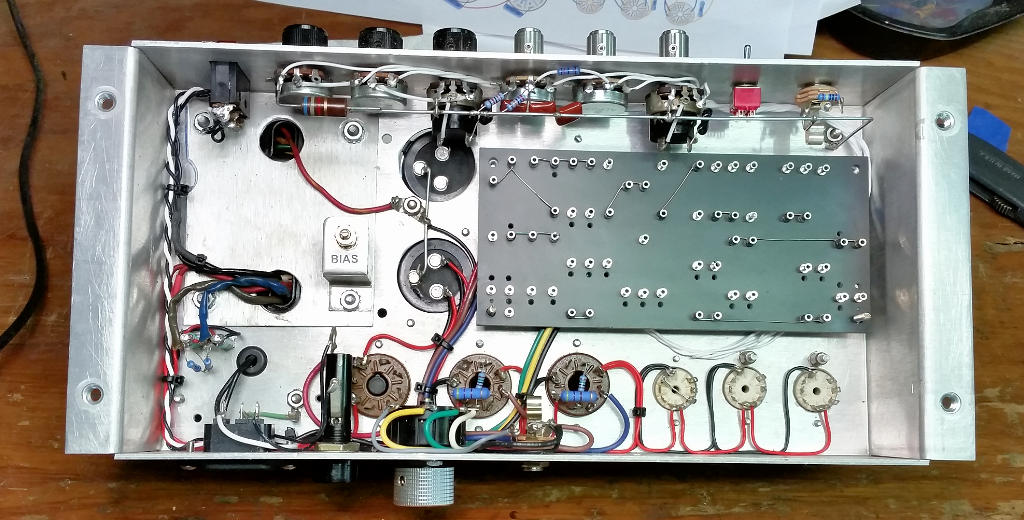
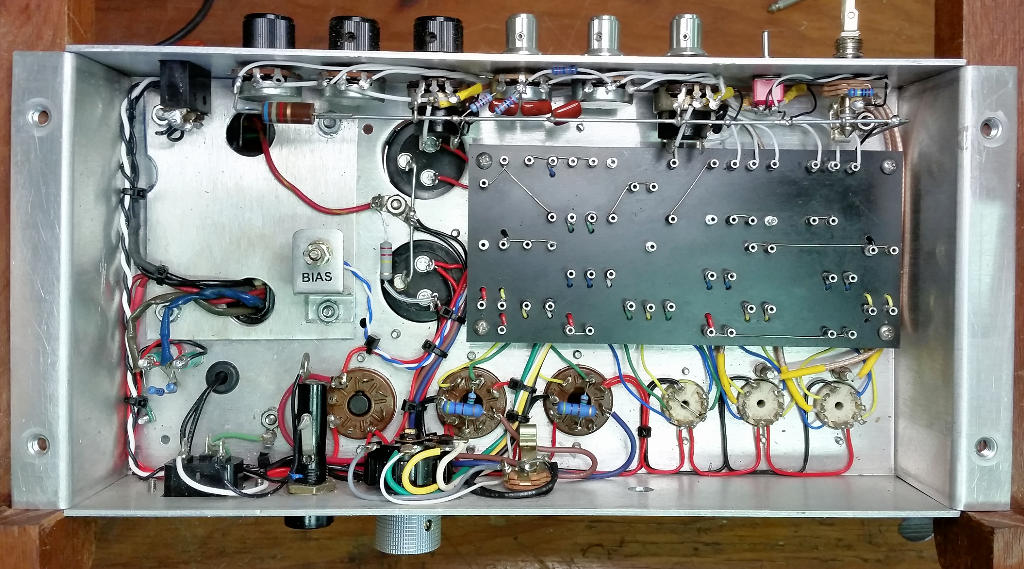
The new OT has multiple secondary taps so I decided to use an impedance
selector switch. The bias pot was relocated inside the chassis. There's
still a bit more chassis wiring to do and then I can wire the board in.
Chassis
wiring is complete and verified. Preliminary voltage checks show correct
filament voltage and unloaded B+ of 450VDC.
Bias supply
installed and verified. Bias range is adjustable from -32VDC to -55VDC.
Time for a flight check.
Flight check passed. One small change. I replaced the IEC connector with a
fused IEC connector and put a standby switch in the vacated fuseholder hole.
Feeling better about the SS rectifier now.
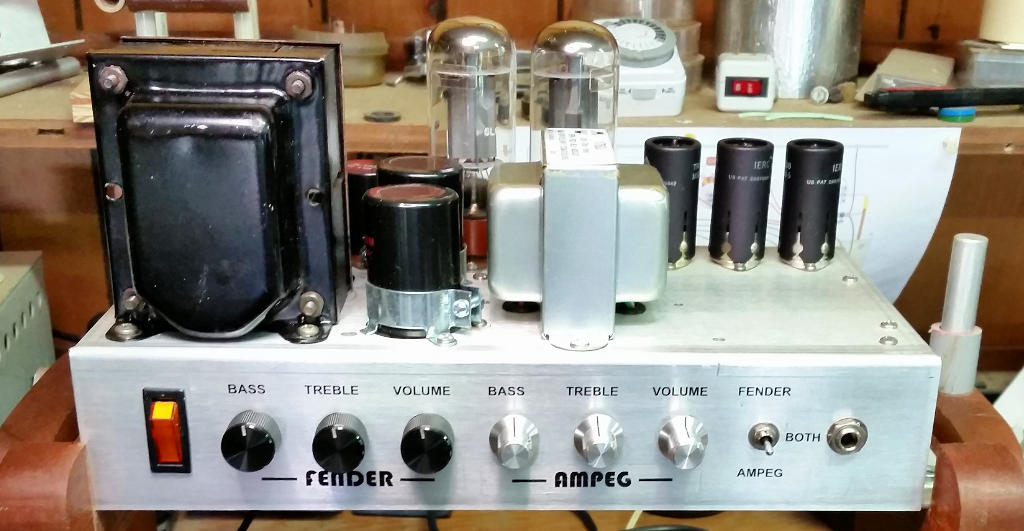
The Phoenix has risen!
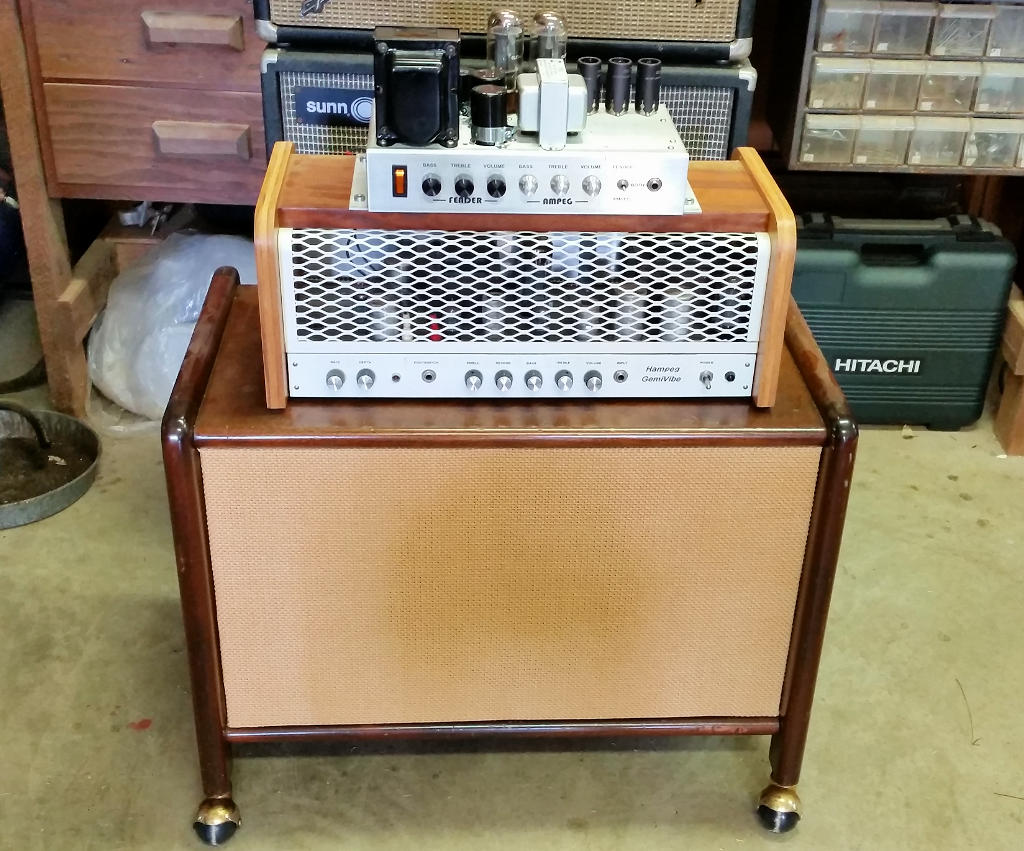
The bird has flown!
And here's the schematic and layout...
phoenix.pdf (385KB)
Return to Index
|